Recording your screen can be very useful. For example, you may want to record a tutorial for your class. Or you may want to share a software demo with your team. Also, you may want to save your favorite video call. In all these cases, screen recording becomes a powerful tool. Many people wonder how to do it properly on a Mac. Specifically, they often ask how to add sound, how to select the recording area, and how to save the file quickly.
If you are one of them, then you are in the right place. This blog will guide you step by step. You will learn exactly how to screen record on mac using built-in tools. You will also see how to include your voice or other audio when recording. Moreover, you will discover extra tips that can make your recordings smoother and easier. The best part is, you don’t need to install any complicated software. In fact, your Mac already has what you need.
So, let us go deeper. We will look at two main methods. First, one uses the Screenshot toolbar. Then, the other uses QuickTime Player. Both work well. Also, both are simple to follow.
how to record screen on mac

Apple makes recording simple. In fact, you don’t need to install anything. Your Mac already has two built-in options. First, there is the Screenshot toolbar. Also, you have QuickTime Player. Both are free and come pre-installed. You can use either depending on your needs.
Using the Screenshot Toolbar
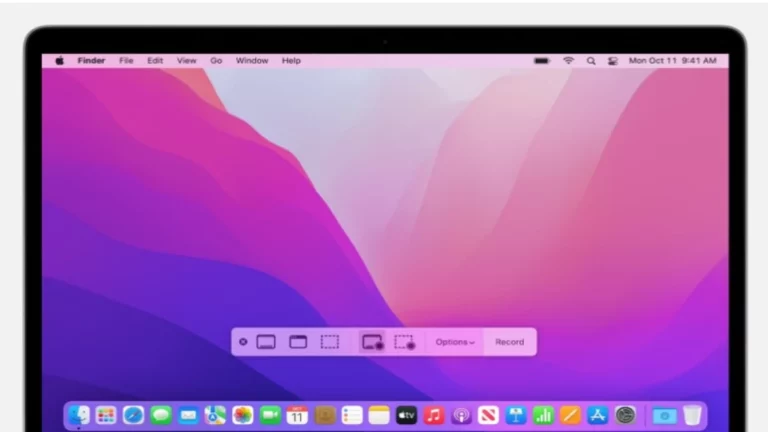
The Screenshot toolbar is fast and easy. Also, it is designed for quick captures. If your Mac runs macOS Mojave (10.14) or newer, it is already there.
Here are the detailed steps:
- Open the toolbar: Press Shift + Command + 5. The toolbar appears at the bottom of the screen.
- Choose your mode: You will see options for screenshots and also two options for screen recording. One lets you record the entire screen, while the other lets you record only a part of it.
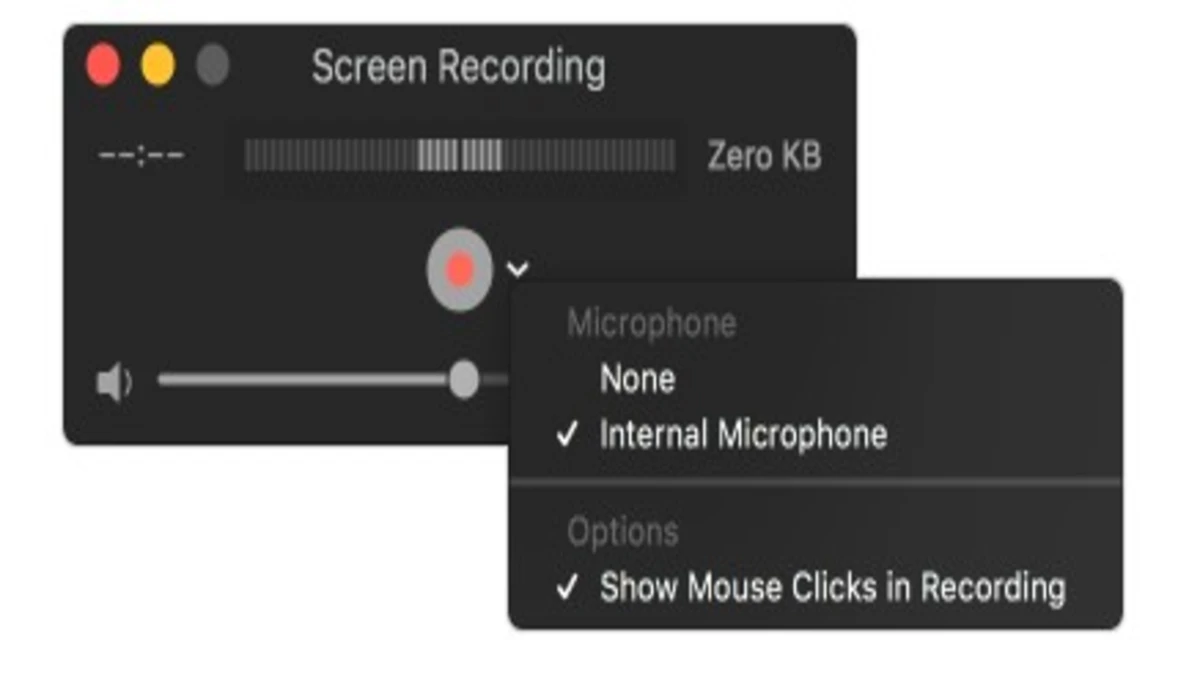
- Set preferences: Click Options. Then, you can select the save location, set a timer, show mouse clicks, and choose a microphone. This step shows you how to screen record on mac with audio.
- Start recording: Click Record. If you selected full screen, click anywhere on the screen to start. If you selected a portion, drag to select the area and then click Record.
- Stop recording: To stop, click the Stop button in the top-right menu bar. You can also press Command + Control + Escape.
- Save or edit: After stopping, a small thumbnail appears in the corner. Then, click it to trim or share. Or, let it save automatically.
This method is great for quick tutorials, online classes, or short clips. Also, it is easy to use, and you can adjust basic settings without extra apps.
Using QuickTime Player
QuickTime Player is another excellent option. It is slightly older but still very useful. Unlike the Screenshot toolbar, QuickTime gives you more control over audio and preview.
Here’s how to use it:
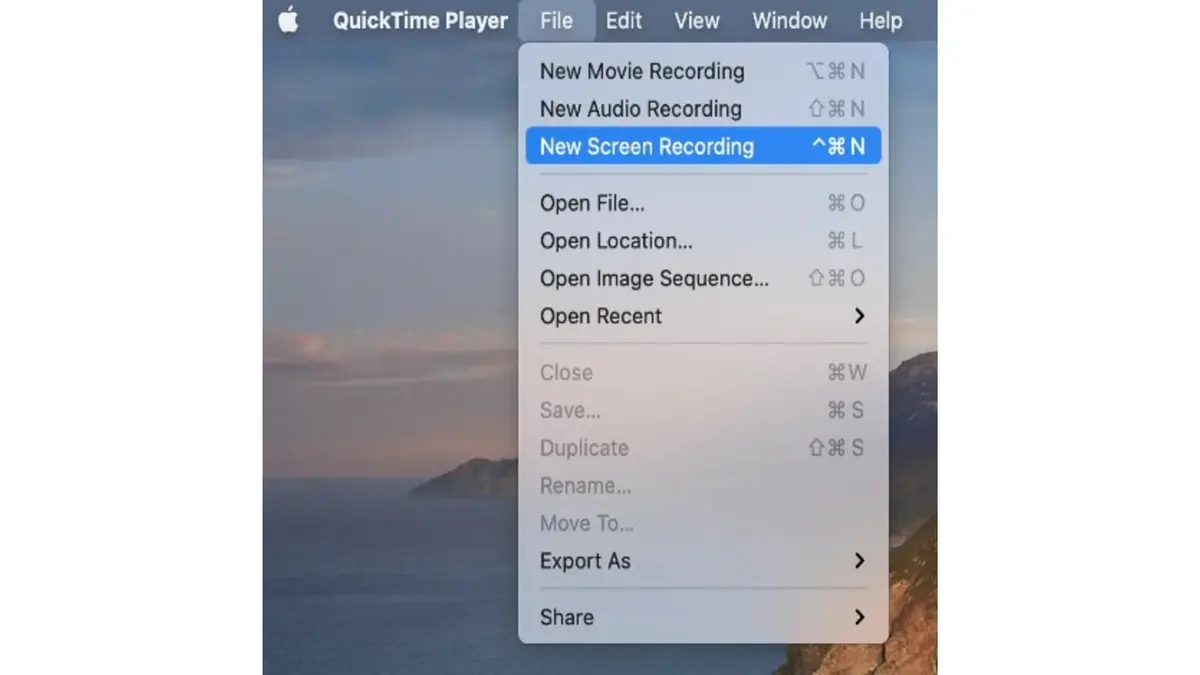
- Open QuickTime Player from Applications.
- From the menu bar, choose File → New Screen Recording.
- A small control panel appears. Then, next to the Record button, click the arrow to see options. Here, you can select a microphone if you want to include your voice.
- To record the entire screen, click anywhere. Start Recording.
- To stop, simply click the Stop button in the menu bar or press Command + Control + Escape.
- After you stop, QuickTime automatically opens your recording. Then, you can easily preview, trim, and save it.
QuickTime is perfect for longer sessions, such as recording full meetings or presentations. It also lets you monitor audio input before starting, which is very helpful if you’re using an external microphone.
Also read:
- Twitgoo: Your Ultimate Guide to Technology
- Comcast.Net Email Login: How To Access Your Comcast Email
- Top AIO Coolers for Gaming PCs in 2023
- How Much is Youtube Premium? A Quick and Short Review
- The Significance of Business Impact Analysis in Cybersecurity
How to Screen Record on Mac with Audio
Many people ask how to add sound to their recordings. For example, you may explain steps and want your voice in the video. Or, you may want background audio. Here are your options:
- With the Screenshot Toolbar: Go to Options, then Microphone. Next, select the built-in microphone or an external mic. Then start recording.
- With QuickTime Player: Click the arrow next to the Record button. Choose your microphone. Then start recording.
- System Audio: By default, macOS does not let you record system audio, such as music or app sounds. However, you can use third-party apps to do this. Therefore, to capture that, you need extra software like Soundflower, Loopback, or BlackHole.
Adding audio, therefore, makes your recordings more engaging. It is ideal for tutorials, walkthroughs, or narrated presentations.
How to Record Screen on Mac for Work
If you are working remotely or collaborating online, how to screen record on mac becomes essential. Meetings can be recorded to review later. Step-by-step guides are easy to make for your team. Training videos also help new employees learn quickly.
For quick sharing, the Screenshot toolbar is best. It creates small files and saves quickly. Meanwhile, for professional recordings, QuickTime is better. Additionally, it offers a clear preview, audio monitoring, and easy saving in different formats. Overall, both are reliable for work.
Using Third-Party Tools
Sometimes you may need advanced features. Maybe you want to record both your screen and webcam. Moreover, maybe you need cloud storage and instant sharing. In that case, try third-party tools.
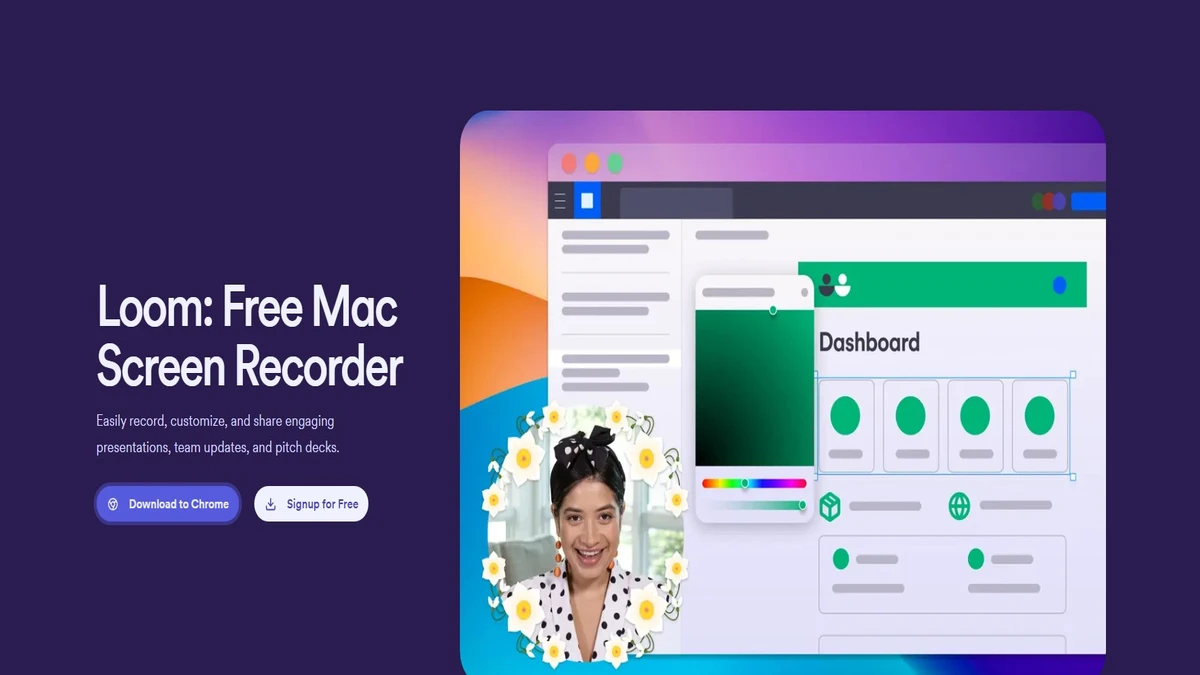
- Loom: Great for work teams. It lets you record your screen, webcam, and mic together. Then, it generates instant shareable links.
- Riverside: Best for podcasts and interviews. Moreover, it records high-quality audio and video separately for easy editing.
- OBS Studio: Excellent for gamers and live streaming. Additionally, it supports overlays, advanced settings, and live broadcasting.
These tools are not necessary for simple recordings. But they are very helpful if you want professional features. Learning how to record screen on macl makes capturing videos easier and faster.
Common Problems and Fixes
Even with the right steps, issues may appear. Here’s how to handle them:
- No audio in recording: Check if you selected the microphone in Options. Also, allow the app under System Preferences → Security & Privacy → Screen Recording.
- File not saved: Look at your save location. If unsure, check Desktop or Downloads.
- Video lagging: Simply close heavy apps, such as browsers. Restart your Mac for smoother recording.
- System sound missing: Also, remember, Mac does not allow this directly. You need extra tools like BlackHole.
- Recording stopped suddenly: Check your storage space. If your disk is full, free some space before recording.
With these fixes, most recording issues can be solved easily.
Conclusion
You now know in detail how to screen record on mac. The Screenshot toolbar works well for quick recordings. However, QuickTime Player is better for longer and more controlled sessions. If you need to include your voice, now you know how to screen record on Mac with audio. Also, you have learned tips, tricks, and solutions to common problems.
Further, screen recording is helpful for work, study, gaming, or personal use. It also helps you explain better, share ideas, and save important moments. Moreover, the best part is that your Mac already has the tools ready. You just need to use them.
So next time you need to capture something, don’t just explain it in words. So, record your screen. It’s simple, it’s fast, and it works perfectly on a Mac.
To Get More Updates, Click Here